


This website uses cookies so that we can provide you with the best user experience possible. Cookie information is stored in your browser and performs functions such as recognising you when you return to our website and helping our team to understand which sections of the website you find most interesting and useful.


Before the “drought” period I knew that it would be nice to use the rain and not just let the rain to water, respectively. to the channel. Natural ponds at that time were not so in and companies to create a pond was scarce. I had a budget from the company, but it was hundreds of thousands of investment was beyond our possibilities. I decided to let the pond with my own “amateur” forces. Seven years ago I created the first pond at our family house. A few years later his second at our family guest house. In this article, I would like to share with you my experience of an amateur, a pioneer of deducting collisions in the garden pond.
How to start or what is needed?

No money into the water. Count the investment of tens of thousands of crowns depending on the size of the water area and design elements (stairs, terrace, rocky dam, …)
There is no need for permission for a water area of up to 40m2. So that the water does not spac and can be cleaned it is necessary to buy pond foils (strength: 1-1.5mm), the offer at FLOBAL is black or green. I bought the foil as a whole (welded on two meter belts) through the eshop. To avoid damaging the pond foil it is good to place geotextile (300g grammage) under it. Geotextile is also suitable under the plant of the zone where there is a duck. For calculating the size of the foil area, remember the sides of the bathing zone. For the calculation I recommend rounding up (even to the even number). For water plants is suitable duck (construction aggregate fraction 16-22 mm). The bathing area is suitable to frame beech wood. With a handy excavator you can pick up the pond in one day with the transport of the material.
Here we go
Plan the size of the pond, our bathing zone in the pond is 18m2 (depth 2.20m (I recommend a depth of over 2 meters, deep means clean), 6 meters long (to swim a little) and 3 meters wide. The other plant zone has an area of 32m2. There is no small sketch, including where the water to the pond flows and where it will flow (where the zero point will be), see. Photo.
Draw space for excavating and plan where with dug clay and stones. There will be a lot of clay. For example, it can be used on the dike of the pond (if you have a sloping terrain) or donate friends who build and need to align the garden. Keep stones somewhere nearby, it will be useful to adjust the perimeter of the pond.
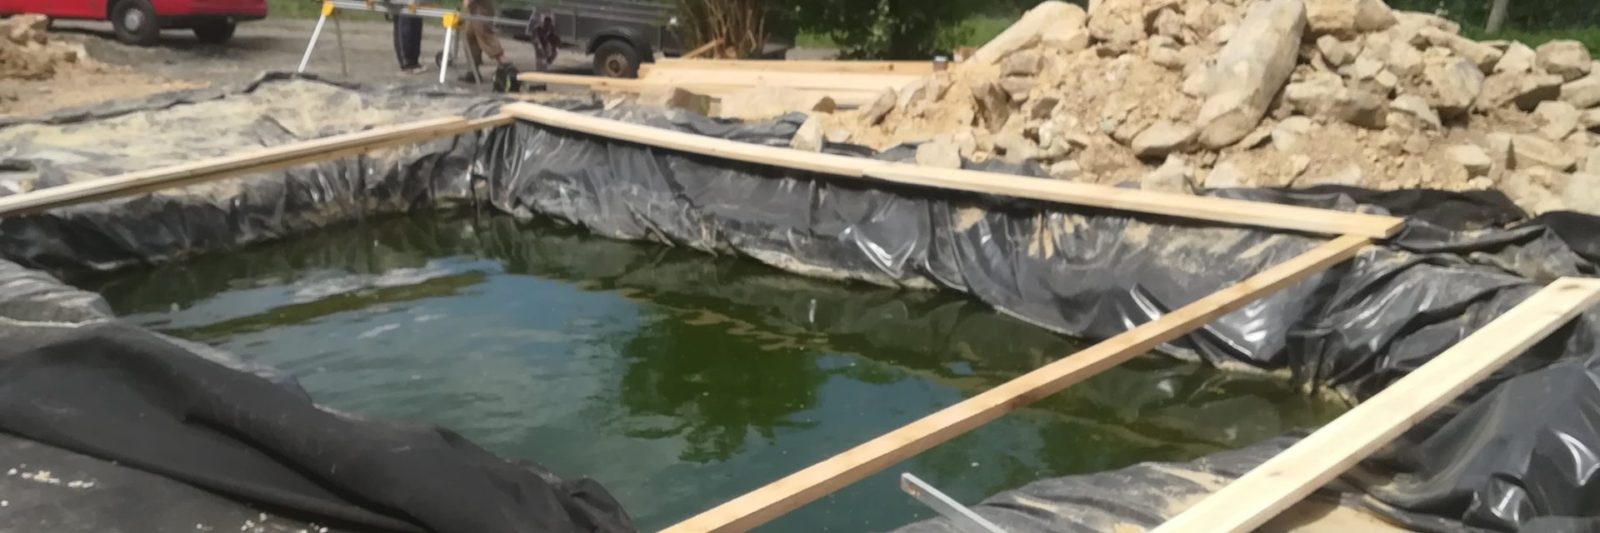
The excavation takes all day, the parties of the bathing zone should be vertical. If the closet sides are not straight, align with a spade or add wet clay back for the holes. The nicer sides, the better the foil is to place and the wooden frame to sit better. But nothing happens when the shore breaks. The tribute will need to support the frame at this point. The bottom can be slightly sloping, respectively. The lowest point is good to place the pump.
Stretch the geotextile and foil as soon as possible after the excavation. First, groundwater will soon appear. Secondly, when it rains, the sides may be rushing. Stretch the geotextile, the belt next to the belt, both in the bathing zone and into the plant zone. You will need helpers to stretch the foil. The foil is heavy for handling. In the corners of the bathing part it bends and it does not look aesthetically well. When the pond is filled, it will not be visible. Do not cut the overlap of the foil, it will be useful when creating a pond dam and then hides under the soil. Check the lowest pond point (zero point) well. If the foil is below, the pond level will not reach the zero point and the water from the pond will drain in a place other than you want. You will not reach the desired level above the frame!
Prepare the drain from the eaves so that you can start filling the pond at the first rain, or do not release from other sources (streams, water registers, firefighters).
Measure the length of oak planks for the frame. I used a length of 3m and a width of 20cm, a thickness of the 4cm frame of the planks sits on the edge of the bathing part, so it is slightly larger than the hole in the ground. To make the frame look visible, add another plank to it to form the shape of the letter T. The height of the letter T will be duck.
Put the geotextilia on the foil at the plant zone and attach it to the bottom of the frame so that the duck does not fall into the bathing zone.


Tips at the end
- Take advantage of all the downspouts from the roof, if the pond is full, it is possible to fill the tanks in the area and in the summer without rain pump to pump water into the pond
- At the eaves you can have a barrel on the rainwater and from it the garden leaving hose into the pond.
- Cleaning bacteria are always needed to sprinkle in spring (water over 10C) to start the self -cleaning process in the pond. There are more and more bacteria manufacturers, according to experience it is necessary to test the products that work with you. The bacteria need to be dispensed with the entire bathing period.
- Frequent use of the pool net removs leaves from the surface before sinking to the bottom equals a clean pond even in several years.
Guaranteed
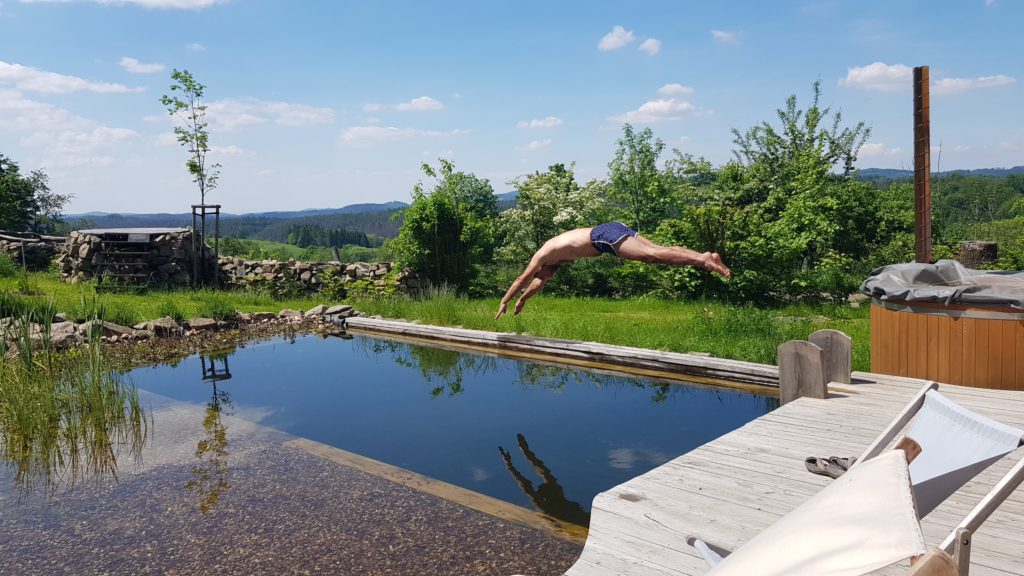
Praise from his wife and year -round bathing, in summer to cool, in winter for hardening.