


here is no roof like a roof
It’s been a few years, when I started looking for information about green roofs and I came across photos of colorful houses in Scandinavia. It’s true, that at the time it was a nut to get the right material and persuade the plumber, to make this experiment work with me. Another roof, this time they bloom, I created it last year and in the article I want to share my experience with you.
Why I wanted another chopping area?
A clear advantage is the temperature stability of the building, water retention and those beautiful words like aesthetics, romance, originality… etc..
The green roof also has a few hooks that you have to reckon with. For example, a higher load-bearing capacity of the roof structure is required, once a year maintenance (chopping).
Don’t be discouraged, let’s go for it.
You have a roof ready on the shed or, like me, on the woodshed (viz. Photo – drevnik).
What material do you need??
I used (viz. photo layered design)?
Geotextile 300g / m2 – protects other layers
Knob drainage foil (bought ordinary in building materials)- retains the necessary water and drains excess water
Root-resistant foil – is the most expensive layer of the roof, example of Fatrafol. Sold in wide strips (1m-2m), which must be glued or welded together. This is a job for more exciting craftsmen with the right tools. You will find a plumber for a few hours and you have it out of your throat. The foil prevents the roots from penetrating the structure.
Aluminum vane strips – sold in length po 2 meters, they are installed on the sloping side of the roof
Roof rails – are installed around the perimeter, I recommend the height at least 15 cm, so that the soil can have sufficient depth (me. 10 cm)
How to do it ?
When you do (or a carpenter) roof construction, must have sufficient load capacity. The soil is heavier than the roofing. It is enough to have a very small slope at the roof. The greater the inclination, the more your soil will move lower (can be solved with a suitable substrate and type of plants).
Install each foil one at a time, see sketch. The root-resistant foil is attached to all sides of the roof. At the bottom of the roof it is attached to the so-called. Aluminum gravel bar (viz. Photo rails and gravel)
When you have the individual layers and roof moldings ready. I recommend doing approx 20 cm gravel walkway around the slats. It holds the soil on the roof surface and also functions as a walking surface. (see photo – slats and gravel) Distribute the soil evenly next to the gravel (or a suitable substrate). I did not use any special substrate for green roofs. I applied to the roof in dozens of buckets of a mixture of soil from the garden and sand (1:1). Viz. Photo – clay
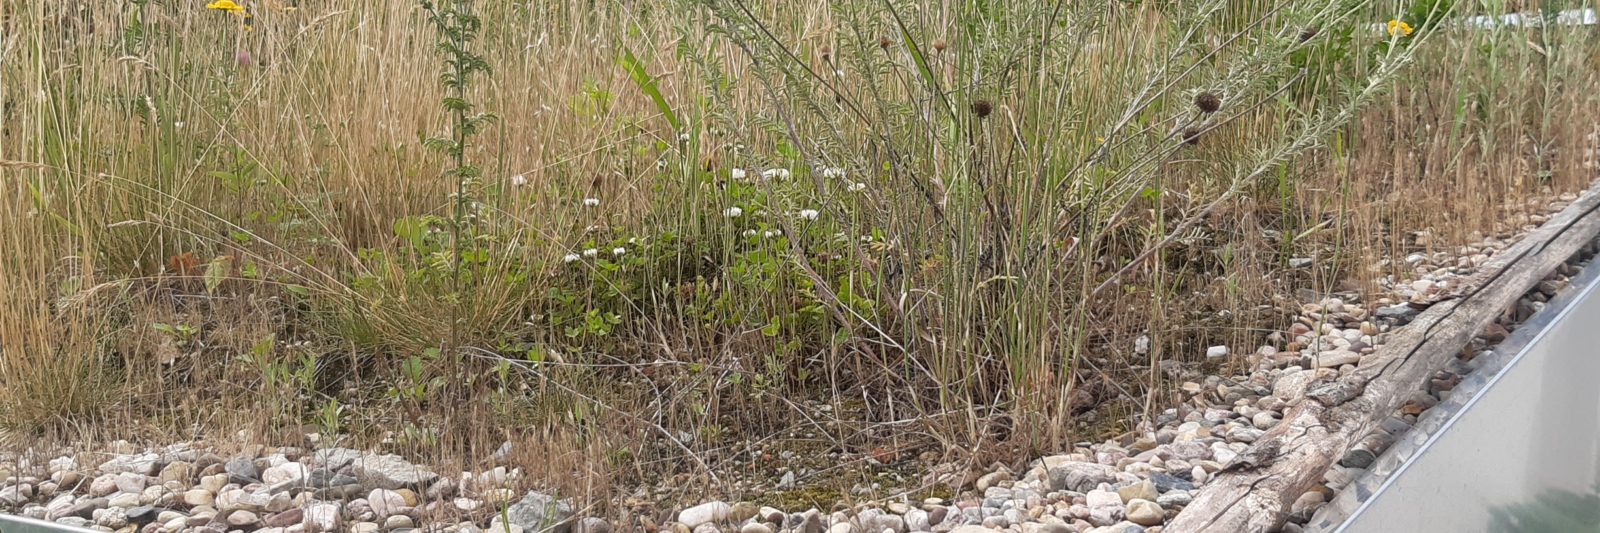
When choosing a seed, think about maintenance in advance. The roof does not mow well. I mow the roof with a string trimmer once a year in the period July-August .
I bought the seeds for the garden roof from Planta Naturalis and sowed according to the instructions (spring or autumn). The vegetation will grow within a year, see photo – result.
Tips:
Tilt. Very small is enough. The bigger, the more the soil “goes” down and gets into the ditch to the bar.
The side rails should be at least 15 cm high, you have to think about it, so that the soil would not fall over them
Nop foil without holes is sufficient. I didn’t buy dear with holes.